










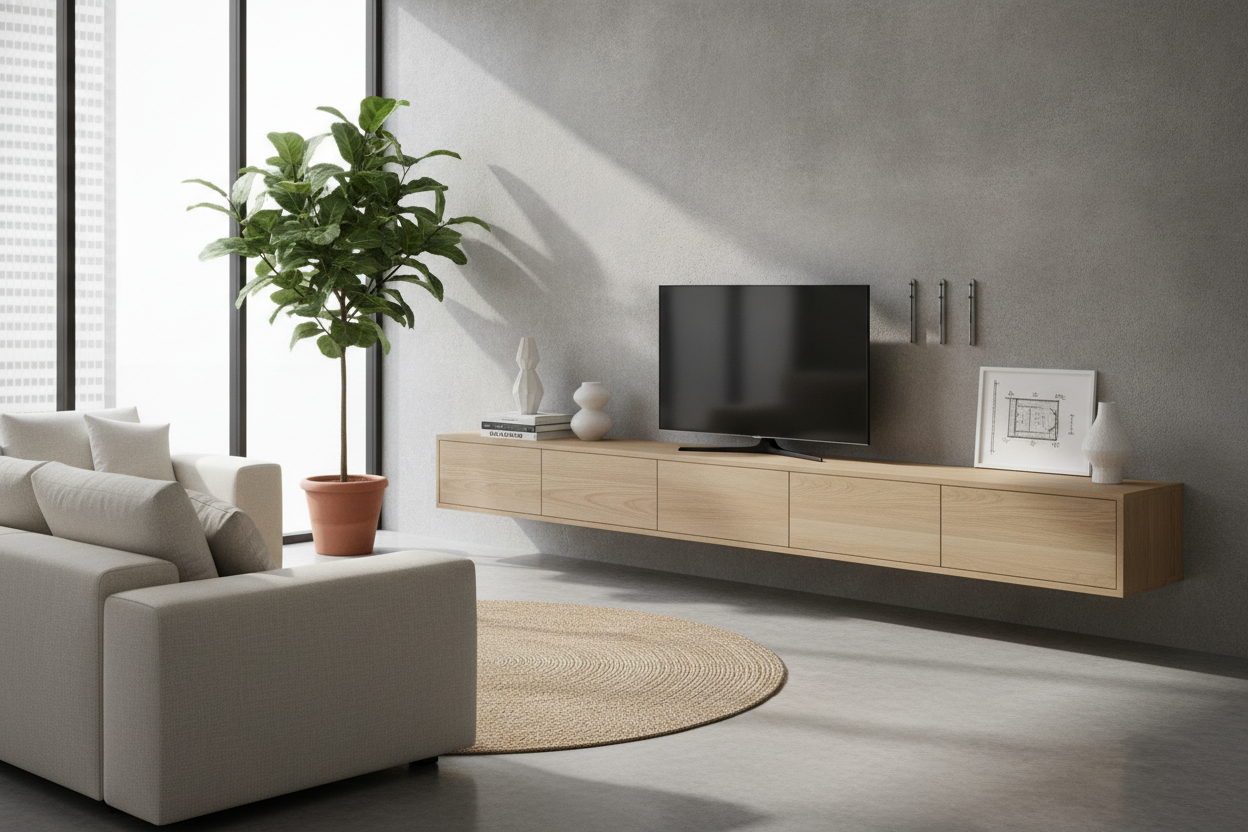
I spent three hours staring at a pile of MDF and a level, convinced that the second I let go of my new floating media consoles, my living room wall would simply give up and collapse. It is a specific kind of DIY-induced vertigo. You want that sleek, airy look you saw on Pinterest, but you are also acutely aware that gravity is a relentless force that does not care about your aesthetic goals.
After living through the installation and the subsequent 'will it fall?' anxiety, I can tell you: the payoff is real. There is something almost magical about seeing your baseboards continue uninterrupted under a cabinet. It tricks your brain into thinking the room is three feet wider than it actually is.
Quick Takeaways
- If you cannot find a stud, do not hang it. Period.
- Cheap particleboard will sag under its own weight within six months; buy solid wood or high-grade plywood.
- Plan your cable management before you drill the first hole, or you will end up with a 'medusa' of wires ruining the vibe.
- Size up—a console that is narrower than your TV looks like a mistake.
The Floor Space Illusion (Why I Finally Caved)
Traditional media furniture is a floor-space hog. It sits there, heavy and stagnant, collecting dust bunnies in that unreachable two-inch gap between the wood and the floor. By switching to a media cabinet floating a few inches off the ground, the entire energy of the room shifted. It felt like my living room could finally breathe.
The clean line of the floor extending all the way to the wall makes a cramped apartment feel significantly more expensive. If you are a renter or the idea of a drill makes you break out in hives, you might want to just get a TV cabinet on legs instead. But for those willing to commit to the wall, the visual lightness is unbeatable.
The Panic of Hitting a Stud (And What Happens If You Miss)
Here is the cold, hard truth: drywall anchors are for picture frames and light mirrors, not a wall mount media cabinet. I do not care what the packaging says about 'holding 50 pounds.' When you factor in the weight of the unit, your soundbar, and that heavy coffee table book you put on top, you are asking for a disaster if you are not screwed directly into the wooden studs of your home.
Installing a floating media unit requires a level of precision that a standard bookshelf does not. If you are off by half an inch, the whole thing looks crooked against the horizon of your floor. I spent more time with my stud finder than I did actually assembling the piece. If you miss the stud, you aren't just making a small hole; you are risking a catastrophic structural failure that takes a chunk of your wall with it.
The Dirty Secret of Floating Media: The Cords
Nothing kills the 'floating' illusion faster than a thick black power cord dangling down to an outlet. It looks like your furniture is on life support. To make floating media actually look good, you have to commit to the hidden cable life. This usually means cutting a hole in the drywall to run cables behind the scenes or using a high-quality paintable cord cover.
I went the 'behind the wall' route, which added another layer of terror to the project. But seeing that clean, wire-free gap between the console and the floor? That is the difference between a professional-looking setup and a messy DIY project. If you aren't prepared to hide the cords, stick to a traditional floor unit.
Why You Absolutely Cannot Cheap Out on Materials
Gravity is a cruel mistress to cheap furniture. A floating media console wood build is almost a requirement here. Why? Because cheap cam-lock connectors and thin particleboard are not designed to be suspended in mid-air with 40 pounds of electronics inside. They will bow, the joints will pull apart, and eventually, the unit will literally peel away from its own mounting bracket.
I have seen those $80 specials online. Avoid them. You want something with a solid back panel or a heavy-duty French cleat system. A sagging media unit floating on your wall does not look 'modern'—it looks broken. Spend the extra money on kiln-dried hardwood or high-end veneer over birch plywood.
Proportions Matter: Going Big Without Looking Bulky
The biggest mistake people make is buying a floating wall media console that is too small. If your console is the same width as your TV, the whole setup looks top-heavy and pinched. You want a large floating media console that extends at least 6 to 10 inches past the edges of your screen on both sides.
This extra width provides a necessary visual anchor. It makes the wall feel like a deliberate composition rather than just a TV slapped above a box. Especially if you have a media cabinet for wall mounted TV, the horizontal lines of a long console help ground the floating screen so it doesn't look like a black void lost in a sea of drywall.
Personal Experience: My 'Leaning Tower' Moment
The first time I tried this, I used a cheap stud finder that lied to me. I ended up mounting one side of a 72-inch console into a stud and the other into... well, nothing. I put my receiver inside, heard a sickening 'pop,' and watched as the left side of the cabinet slowly migrated three inches downward. I had to rip the whole thing off, patch the wall, and start over. Learn from my arrogance: buy a magnetic stud finder and double-check every mark.
Frequently Asked Questions
How high should I mount my floating console?
Usually, 10 to 12 inches off the floor is the sweet spot. It is high enough to let a vacuum under but low enough that the TV stays at eye level when you are sitting on the sofa.
Can I install this on a brick wall?
Yes, but you will need a masonry bit and Sleeve Anchors or Tapcons. It is actually more secure than drywall, provided you do not hit the mortar joints exclusively.
Will it hold a heavy 75-inch TV?
Most floating consoles are designed to hold the components (consoles, players), while the TV itself should be mounted to the wall. Do not sit a massive, heavy TV directly on a floating unit unless it is specifically rated for that weight and bolted into every possible stud.

Leave a comment
This site is protected by hCaptcha and the hCaptcha Privacy Policy and Terms of Service apply.