


Few things are more frustrating than walking through your front door and immediately stumbling over a pile of sneakers, backpacks, and mail. The entryway is the first impression your home makes, yet it often becomes the messiest catch-all zone in the house. A sturdy, well-designed seat can solve this instantly, acting as both a designated landing pad and a hidden organizer. While buying furniture is an option, learning how to build an entryway bench allows you to customize the dimensions to fit your specific space, whether you have a grand foyer or a narrow hallway.
I distinctly remember the weekend I finally decided to tackle this project. My "foyer" is really just a glorified patch of hallway, and for years, we relied on a flimsy shoe rack that wobbled every time a coat landed on it. One rainy Tuesday, I tripped over a muddy boot and nearly took out the drywall. That was the breaking point. I sketched out a simple design on a napkin, bought some lumber the next morning, and spent Saturday building an entryway bench. The difference it made was immediate. Not only did the clutter disappear, but the space suddenly felt finished and intentional.
Planning Your Design and Dimensions
Before you make a single cut, you need a solid game plan. The beauty of a diy entryway bench is that you are the architect. Start by measuring your available space. If you are working with a tight area, a diy hallway bench might need to be shallow—around 12 to 14 inches deep—whereas a standard foyer can accommodate a depth of 16 to 18 inches. Height is standard across most furniture; aim for 18 inches tall for comfortable seating.
Once you have your measurements, look for entryway bench design plans that match your skill level. You don't need to be a master carpenter to succeed here. A simple entryway bench often consists of a box frame with a top and four legs, while more advanced projects might involve drawers or hinged lids. If you are specifically looking for diy entryway bench with storage plans, decide early if you want open cubbies for baskets or a flip-top seat to hide winter gear. Finding the right woodworking plans for entryway bench construction will save you wasted lumber and frustration later.
Gathering Materials and Tools
For a standard wooden entryway bench plans execution, you will generally need dimensional lumber like 2x4s for the frame and 1x12s or plywood for the surfaces. If you want a more polished look, pine boards are cost-effective and paint well, while hardwoods like oak or maple offer durability if you plan to stain the piece.
Your toolkit should include:
- Circular saw or miter saw
- Power drill and impact driver
- Pocket hole jig (highly recommended for hidden joinery)
- Orbital sander
- Wood glue and 2.5-inch screws
- Tape measure and speed square
The Build Process: Constructing the Frame
When figuring out how to make an entryway bench, the frame is everything. It needs to support the weight of people sitting down to tie their shoes. Start by cutting your legs to size. If you are following plans for entryway bench frames that use a farmhouse style, 4x4 posts work excellently for legs, providing substantial visual weight and stability.
Connect your legs using apron boards (usually 1x4s or 2x4s). This is where a pocket hole jig shines. It allows you to drill screws at an angle into the wood, hiding the screw heads on the inside of the frame. This technique makes building an entryway bench significantly faster and results in a cleaner look. Ensure your frame is square by measuring diagonally from corner to corner; the numbers should be identical.
Adding Storage Functionality
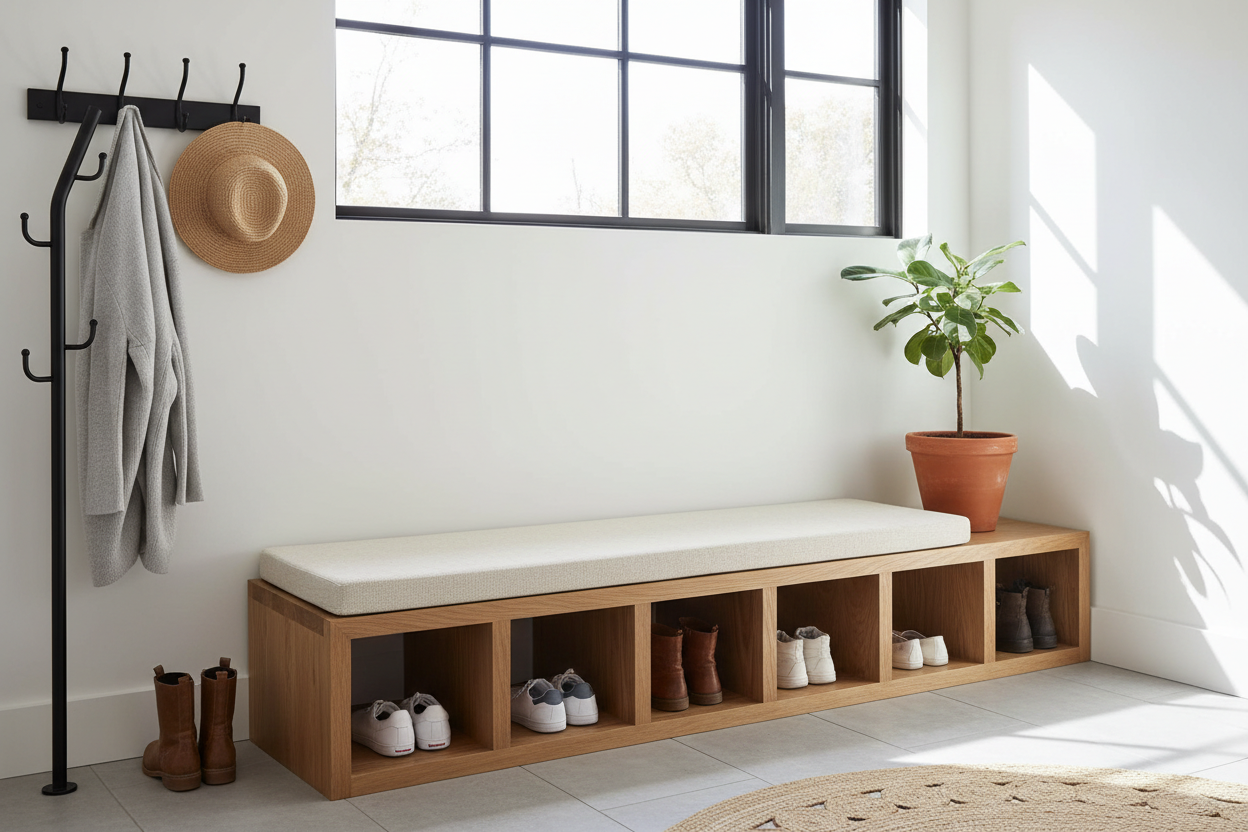
A bench without storage is just a chair that takes up too much room. To maximize utility, most builders prefer a diy entryway storage bench. There are two main ways to approach this. The easiest method is creating a bottom shelf. simply attach cleats to the inside of the legs about 3 inches off the ground and lay slats across them. This creates a perfect rack for shoes.
For those who want to hide the clutter completely, you might look into diy entryway bench with storage plans that utilize a hinged top. This turns the inside of the bench into a toy box or blanket chest. If you choose this route, ensure you buy high-quality torsion hinges so the heavy lid doesn't slam down on fingers. Alternatively, vertical dividers can be installed to create cubbies, turning a basic structure into a diy bench for entryway organization that rivals custom cabinetry.
Installing the Seat and Finishing
With the base constructed, you need to attach the seat. If you are learning how to build a entryway bench with a solid top, you can use a project panel (glued-up pine) or join several 2x6 boards together. Allow for a 1-inch overhang on the front and sides for a professional appearance. Attach the top from underneath through the apron supports so no screw holes are visible on the seating surface.
Sanding is the step that separates a novice diy foyer bench from a piece of fine furniture. Start with 80-grit sandpaper to remove rough spots and work your way up to 220-grit for a smooth finish. If you built a diy built-in entryway bench, you might be painting it to match your trim. In that case, use a stain-blocking primer first. For natural wood looks, apply a conditioner followed by your stain of choice and at least three coats of polyurethane to protect against wet coats and muddy pants.
Adapting for Different Spaces
Not every home has a massive mudroom. If you are looking for hall bench plans or hallway bench plans, the principles remain the same, but the scale changes. A diy hall bench works best without a backrest to keep the visual profile low and unobtrusive. Conversely, if you have an alcove, you can scribe the bench top to fit flush against the wall, creating a permanent fixture. Regardless of the size, knowing how to make entryway bench adjustments ensures the final piece fits your lifestyle.
Taking the time to build entryway bench furniture yourself is rewarding. You get a custom fit, specific storage solutions, and the pride of knowing you created something with your own hands. Whether you choose an easy diy entryway bench made from construction lumber or a sleek, modern design, the result is a more organized, welcoming home.
Frequently Asked Questions
What is the best wood to use for a DIY entryway bench?
For a painted finish, poplar or pine are excellent choices because they are affordable and smooth. If you plan to stain the bench, hardwoods like oak, maple, or walnut are superior options as they are more durable and resist dents from daily use better than softwoods.
How deep should an entryway bench be?
A standard entryway bench should be between 15 and 18 inches deep to provide comfortable seating. However, if you are building for a narrow hallway, you can reduce the depth to 12 or 13 inches, which is still sufficient for sitting briefly to put on shoes without obstructing traffic flow.
Do I need a Kreg jig to build a bench?
While you do not strictly need a Kreg jig, using one makes the assembly process much faster and stronger for beginners. Pocket holes allow you to hide screws on the underside or inside of the frame, eliminating the need for complex joinery or unsightly face screws.

Leave a comment
This site is protected by hCaptcha and the hCaptcha Privacy Policy and Terms of Service apply.