


I spent three years staring at a 55-inch black rectangle that sucked the soul out of my living room. Even when it was off, it felt like a giant void that commanded all the furniture to point its way. I wanted a diy wall mounted tv cabinet with doors that didn't look like a crate I found behind a dumpster, but every custom option I found online was priced like a used Honda Civic.
After a weekend of sawdust, three trips to the hardware store, and a few choice words, I finally have a room that feels like a home again, not a waiting room at a tech repair shop. If you have basic tools and a bit of patience, you can reclaim your space too.
- Cost: Approximately $215 for lumber and hardware.
- Time: One full weekend (Saturday build, Sunday finish).
- Tools: Drill, circular saw with a guide, and a pocket hole jig.
- Skill Level: Intermediate—mostly because doors are notoriously finicky.
Why I Finally Decided to Hide My Screen
There is a specific kind of visual fatigue that comes from having your decor dictated by a piece of glass. It turns every living space into a shrine to streaming services. I realized my apartment felt like a sports bar, and not even a cool one—more like the kind with sticky floors and lukewarm wings. No matter how many plants I bought, the TV was the loudest thing in the room.
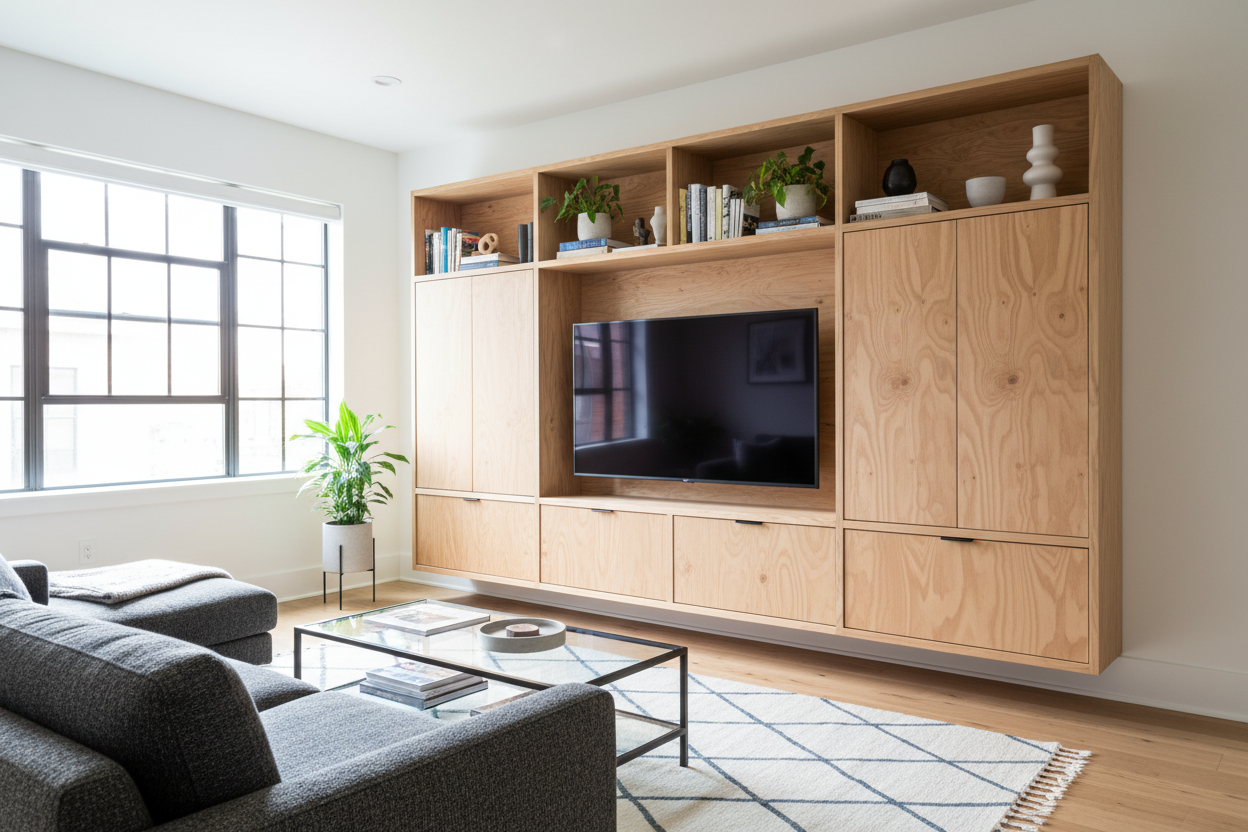
Building this cabinet changed the entire energy. When the doors are closed, the room feels curated and quiet. I actually read books now because the TV isn't begging for attention. It is honestly incredible how a TV wall cabinet with doors cured my sports bar living room by simply giving the eye something else to land on besides plastic and wires.
Planning Your DIY Wall Unit For TV (Math Included)
The biggest mistake people make when planning a diy wall unit for tv is forgetting that electronics need to breathe. If you build a tight box, your TV will overheat and die a slow, expensive death. You need at least 2 to 3 inches of clearance on all sides and a way for heat to escape the top or back. I learned this the hard way after my first prototype felt like an oven after one episode of a show.
Measure your TV width, height, and depth including the wall mount. For my 55-inch screen, the cabinet ended up being 54 inches wide by 34 inches tall. I used 3/4-inch birch plywood for the main box. Whatever you do, avoid the cheap construction studs from the big-box store. They are usually wet and will warp as they dry, turning your beautiful cabinet into a trapezoid within a month. Stick to cabinet-grade plywood or kiln-dried hardwoods if you have the budget.
How To Build A TV Wall Cabinet Without Losing Your Mind
The secret to how to build a tv wall cabinet is working in stages. Don't try to build the whole thing in one go. Break it down into the frame, the mount, and the doors. If you rush the assembly, your doors won't close flush, and you'll be reminded of that failure every time you walk into the room.
Building the Main Frame First
The frame is just a big, sturdy box. I used pocket hole screws because they are fast, strong, and hidden from view. Apply wood glue to every joint—the screws hold it while the glue dries, but the glue does the actual heavy lifting. Use corner clamps to keep it perfectly square. If your box is even a quarter-inch out of square, your doors will never hang straight, and you'll spend hours sanding things down in frustration.
The Magic of a French Cleat for Wall Mounting
Do not try to screw this box directly through the back into the wall while holding it up. It is heavy, and you will drop it. Use a French cleat. It is a system where two pieces of wood are cut at a 45-degree angle to interlock. One rail goes on the wall, bolted into the studs, and the other goes on the back of the cabinet. You just lift the cabinet and drop it onto the wall rail. It is incredibly secure and makes it easy to slide the cabinet left or right to center it perfectly.
Attaching the Doors (And Getting Them Straight)
This is the part where most DIYers lose their cool. Getting doors to align is a dark art. I used concealed 'Euro' hinges because they are adjustable in three directions. If the doors are sagging or have a gap in the middle, you just turn a screw to shift them. I went with simple flat-panel doors to keep the look modern. If you are worried about the wood splintering when you drill for hinges, put a piece of painter's tape down first. It keeps the edges crisp and saves you a ton of wood filler work later.
The Final Reveal (And What I'd Do Differently Next Time)
The finished product looks like a high-end piece of custom cabinetry. Total cost was $212, which is a steal compared to the $1,200 versions I saw in boutique catalogs. If I did it again, I would probably add a small channel for a soundbar inside the cabinet, as the audio can get a bit muffled if you keep the doors closed while listening to music. I also might go with a darker stain to hide the plywood grain a bit more.
If you have a massive screen—say, 75 inches or larger—building a cabinet this size is a massive structural undertaking. You might be better off looking for a large TV cabinet spacious storage option that is already engineered to handle that kind of weight and span. But for a standard living room, this project is the ultimate wall TV cabinet with doors that enclose TV hack to make your home feel like an adult lives there. It is worth every ounce of sawdust.
FAQ
Can I build this with just a hand saw?
Technically yes, but your arms will hate you and your cuts likely won't be straight enough for the doors to fit. A circular saw with a straight-edge guide is the bare minimum I would recommend for a clean, professional look.
How do I handle the cables?
I drilled a 2-inch hole in the bottom of the cabinet and used a plastic desk grommet. I then ran the cables through a paintable cord cover on the wall. It looks professional and hides the 'spaghetti' mess of HDMI cables.
Will the TV get too hot?
As long as you have that 2-inch gap around the edges and don't leave the doors closed for 10 hours while gaming, you will be fine. For extra safety, you can drill a few 1-inch ventilation holes in the top panel to let the rising heat escape.
Dejar un comentario
Este sitio está protegido por hCaptcha y se aplican la Política de privacidad de hCaptcha y los Términos del servicio.