


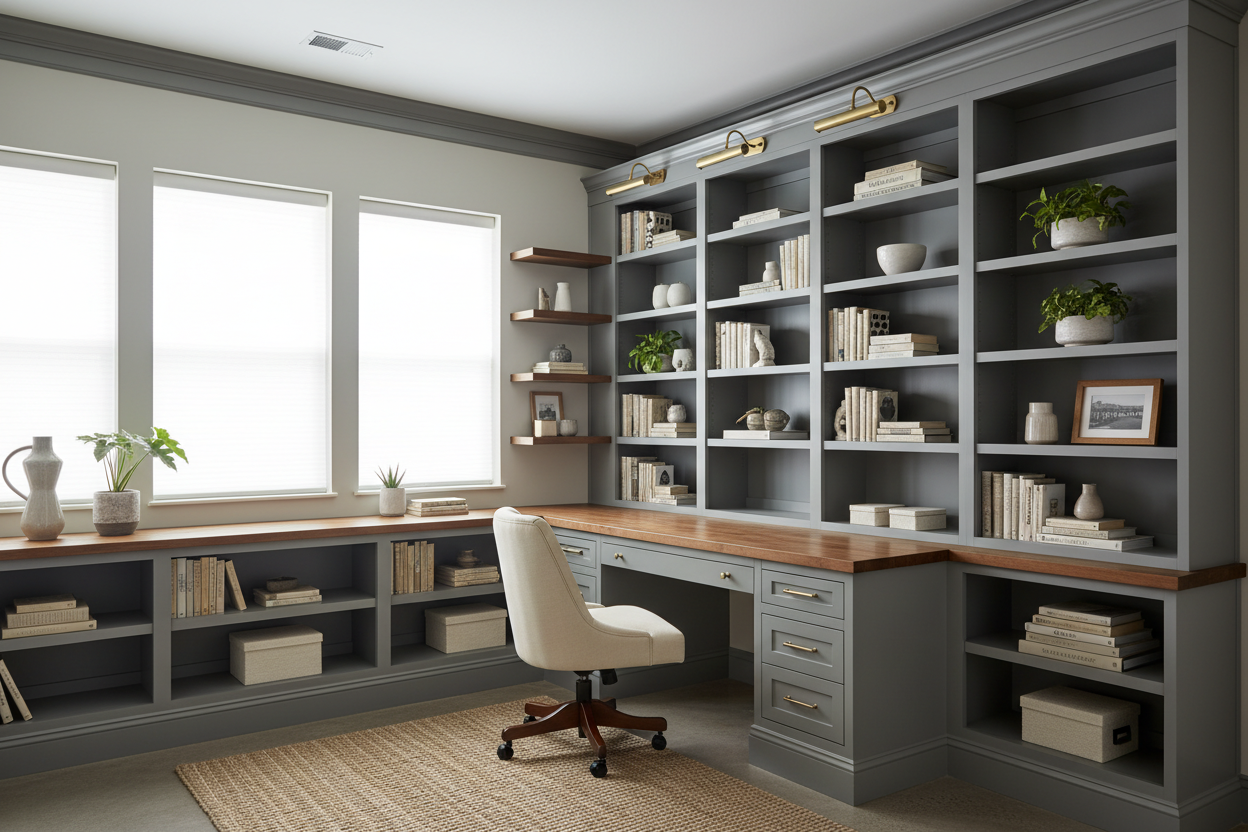
We have all stared at a blank wall in a home office or living room, envisioning floor-to-ceiling millwork, only to be brought back to reality by a carpenter's five-figure quote. The gap between a high-end vision and a renovation budget is often where creativity thrives. As a designer, I frequently advise clients that a built-in desk and shelves ikea configuration, when executed with architectural intent, can mimic bespoke joinery for a fraction of the cost.
Key Features for a High-End Finish
Before buying flat-packs, review these critical factors to ensure your project looks permanent rather than temporary:
- Base Unit Selection: Choose cabinets with adequate depth (e.g., Sektion or Havsta) over shallow bookcases for the desk support to ensure ergonomic legroom.
- Material Consistency: Opt for solid wood or high-grade veneer countertops (like the Karlby) rather than hollow-core laminate to prevent sagging under monitor weight.
- Filler Pieces: The secret to the "built-in" look is using filler panels to close gaps between the unit and the wall/ceiling.
- Hardware Upgrades: Discard standard knobs; heavy brass or matte black hardware changes the entire tactile experience.
Selecting the Right System: Billy vs. Sektion vs. Pax
Not all IKEA lines are created equal when structurally hacking them into a workspace. Your choice depends entirely on the visual weight and utility you require.
The Kitchen Cabinet Route (Sektion/Metod)
For a truly robust ikea built in bookcase and desk, I almost exclusively recommend starting with kitchen base cabinets (Sektion in the US, Metod in EU). These units are designed to bear the weight of stone countertops, making them superior for desk foundations. They offer deep drawers for file storage, which keeps the visual clutter off the desktop.
The Bookcase Route (Billy/Havsta)
If your priority is vertical storage for a library aesthetic, the Billy series is the standard. However, a word of caution regarding depth: a standard Billy is only about 11 inches deep. To create a functional desk return, you must pull the desk surface out significantly past the shelves, which can create a visual disconnect if not managed with side panels.
The Art of the Countertop and Scribing
The surface where you work dictates the longevity of the piece. Avoid the paper-filled laminate tops often sold in the office section. Instead, source a solid oak or walnut kitchen worktop. This allows you to cut the timber to the exact length of your wall.
Pro Tip: Walls are rarely perfectly straight. You will need to "scribe" your countertop—shaving the back edge to match the undulations of your drywall. This seamless connection is what separates a DIY project from professional interior design.
Visual Balance and Lighting
To elevate the composition, consider the negative space. Do not fill every shelf with books. Use the "rule of thirds" to mix organic textures (ceramics, plants) with linear objects (books). Furthermore, integrated lighting is non-negotiable for a luxury feel. Routing channels for LED tape lights into the underside of your shelves before installation provides a warm, ambient glow that highlights your decor and reduces eye strain.
Lessons from My Own Projects
I learned a hard lesson about floor leveling during a project in a pre-war apartment in Chicago. I assumed the floor was relatively flat and installed a massive wall of Pax units and a connecting desk directly onto the existing floorboards.
Once the weight of the books and equipment was added, the units settled into the dip of the floor, causing the cabinet doors to skew violently. No amount of hinge adjustment could fix it because the chassis itself was torqued. I had to dismantle the entire build and construct a custom 2x4 plinth base that was laser-leveled before sliding the IKEA units on top. Now, I never skip building a custom base platform. It allows you to run new baseboards across the bottom for that seamless, architectural look, and it ensures your drawers glide perfectly smooth, regardless of the subfloor's condition.
Conclusion
Creating a sophisticated workspace doesn't require a custom woodshop; it requires patience and attention to the finishing details. By focusing on substantial materials, proper lighting, and precise fitting, your IKEA hack will feel less like a temporary fix and more like a permanent, value-adding asset to your home.
Frequently Asked Questions
How do I paint IKEA furniture to look custom?
The key is adhesion. You must lightly sand the laminate surface to create "tooth," then use a high-quality shellac-based primer (like BIN) before applying your cabinet enamel. Without the right primer, the paint will scratch off within weeks.
What is the ideal depth for the desk portion?
For a comfortable workspace, aim for a depth of at least 24 inches (60cm). This provides enough distance for a monitor without cramping your typing posture. Standard bookcases are often too shallow for this, necessitating a deeper countertop.
How can I hide the computer cords?
Plan your cable management before installation. Drill grommet holes into the countertop and the side panels of the cabinets to route wires internally toward the outlet. Ideally, have an electrician move an outlet to the inside of the base cabinet to keep everything hidden.

Leave a comment
This site is protected by hCaptcha and the hCaptcha Privacy Policy and Terms of Service apply.