


I spent three months staring at a 43-inch alcove in my living room. Every cabinet I found online was either a puny 30 inches or a hopeful 48. I tried to fill the gap with a tall plant, then a floor lamp, then a stack of magazines that just ended up collecting cat hair. Eventually, I realized I was trying to solve a structural problem with a band-aid. I didn't need another piece of furniture; I needed a custom built-in.
Standard furniture is designed for an average home that doesn't actually exist. My 1920s bungalow has walls that lean and floors that slope two inches from left to right. Once I stopped fighting the architecture and decided to work with it, everything clicked. It’s the difference between a suit off the rack and one that’s actually been tailored to your shoulders.
- Custom storage eliminates 'dead zones' where dust and pet hair congregate.
- Going floor-to-ceiling draws the eye upward, making 8-foot ceilings feel much taller.
- Closed lower cabinets are essential for hiding the visual noise of modern life.
- Filler strips and crown molding are the secret to making cheap boxes look like bespoke millwork.
The Breaking Point: Shoving Square Furniture Into Bizarre Holes
We’ve all been there. You buy one of those freestanding storage cabinets, spend four hours with an Allen wrench, and slide it into place only to find a three-inch gap on the side. It’s too small for a vacuum, but just large enough to lose your mail and a few socks. It looks temporary, like your house is just a waiting room.
I finally hit my limit when I realized I was spending more on 'filler' decor than the actual cabinet cost. A custom storage unit isn’t just about the shelves; it’s about claiming every square inch of your footprint. When you build to the walls, the furniture becomes part of the room’s DNA. You’re not just adding a box; you’re finishing the architecture. My first attempt involved a 36-inch dresser that left exactly 7.5 inches of wasted space—a literal vacuum for dust bunnies and lost LEGOs.
Why a Custom Built-In Actually Makes the Room Look Bigger
It sounds counterintuitive to fill an entire wall with custom built storage when you’re worried about space. But here’s the trick: visual continuity. When a cabinet stops six inches below the ceiling, it creates a shadow line that chops the room in half. It makes the ceiling feel like it’s bearing down on you.
By taking your custom storage units all the way up, you remove those distracting breaks. If you paint the unit the same color as your walls—use a satin or semi-gloss for durability—the whole thing recedes. Suddenly, that cramped alcove looks like an intentional architectural feature rather than a cluttered corner. I’ve seen this work in 10x12 bedrooms where a full wall of wardrobes actually made the room feel airier than a single dresser ever did because it eliminated the visual 'noise' of separate furniture pieces.
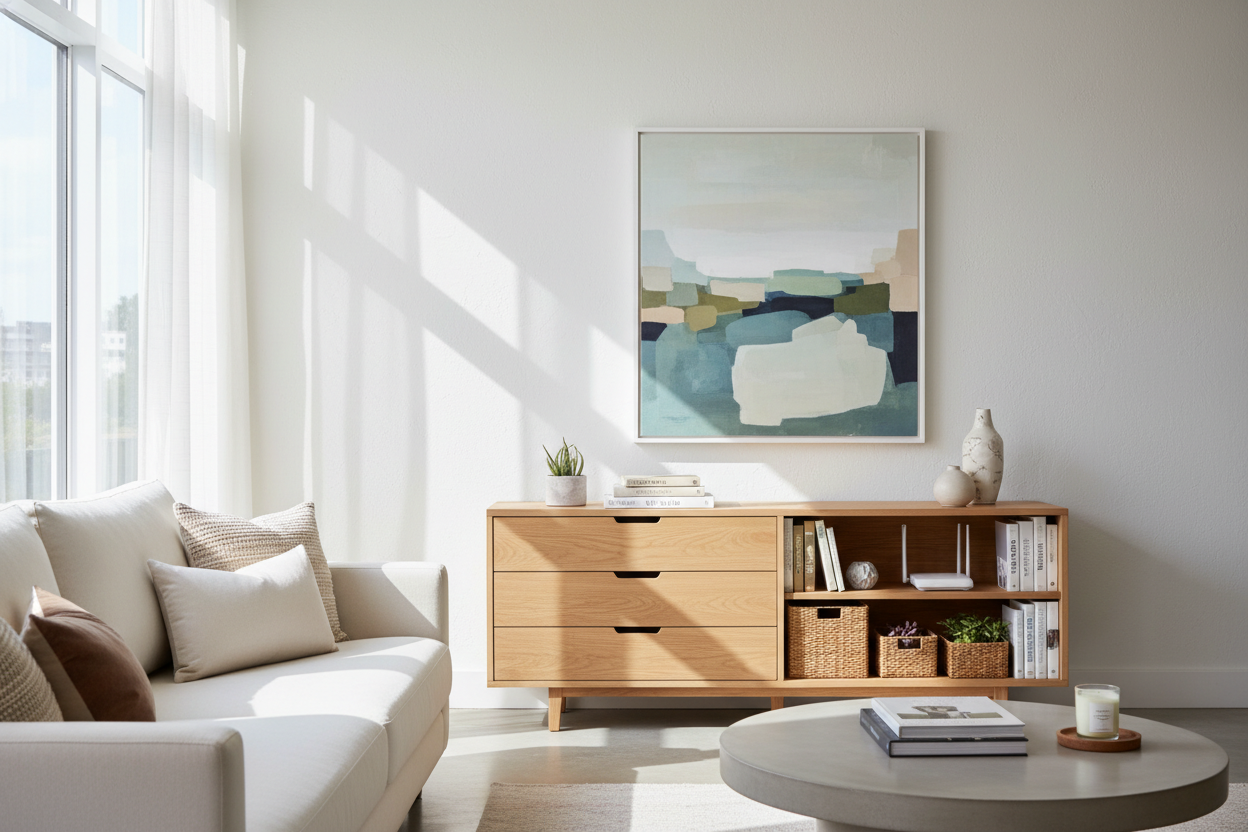
The Magic of Built In Cabinets With Drawers (Hide the Chaos)
Open shelving is a trap. Unless you live in a museum or have a professional stager on payroll, your shelves will eventually be covered in half-read paperbacks and random chargers. This is why you need built in cabinets with drawers. The bottom 30 to 36 inches of any unit should be solid, enclosed storage. This is where the 'real life' stuff goes.
I always advocate for seamless integration with doors on the bottom half. Drawers are even better because you don’t have to get on your hands and knees to find that one specific HDMI cable at the back. When the bottom is heavy and closed, the top can be light and open. It creates a grounded look that doesn’t feel top-heavy. I used 3/4-inch plywood for my drawer boxes—none of that 1/2-inch flimsy stuff—and full-extension slides so I can actually reach the back.
How to Bridge the Gap Between Off-the-Shelf and Bespoke
Let’s be honest: hiring a master carpenter to build custom storage cabinets from scratch can cost as much as a used Honda. If that’s not in the cards, you hack it. I’ve built 'custom' units using high-quality stock kitchen cabinets as the base. The secret isn’t the box; it’s the trim. Use 1x4 pine to bridge the gaps between the cabinet and the wall, then wrap the whole thing in chunky crown molding.
You can make standard pieces look custom by replacing the flimsy cardboard backs with real wood and swapping out generic hardware for something heavy and brass. Once it’s all caulked and painted, no one will know it started as a flat-pack kit. One mistake I made early on was using cheap MDF for the baseboard area—it absorbed water the first time I mopped the floor and swelled up. Stick to solid wood for the kickplate.
What to Put Where: Balancing Display and Disguise
When designing your custom built in storage cabinets, don't just wing it. Measure your tallest books. Measure that weirdly large vase you inherited. Leave about 20% of your shelf space empty—it’s called 'breathing room,' and without it, your custom built-in just looks like a warehouse rack. Mix textures: wood, glass, and metal.
If you have a collection you’re actually proud of, consider integrating a glass display cabinet section. It breaks up the monotony of solid wood and adds a layer of depth. I personally like to put lighting inside the glass sections; it creates a soft glow in the evening that makes the whole room feel expensive. Just remember: the glass is for the pretty things, the drawers are for the junk. My rule of thumb? If it has a cord, it goes behind a door.
Is a built-in worth the investment?
Absolutely. Unlike a sofa that loses half its value the second you sit on it, a well-executed built-in adds permanent value to your home. It’s considered a fixture, meaning it stays with the house and buyers love seeing 'ample storage' in a listing.
What material should I use?
If you're painting it, MDF is actually great for the large flat panels because it doesn't shrink or swell with the seasons. But for the structural frames and any shelves that will hold heavy books, stick to 3/4-inch plywood. Avoid the thin particle board found in cheap kits—it will sag within a year under the weight of a few hardcovers.
Can I do this in a rental?
Probably not a permanent one. However, you can create 'pseudo-built-ins' by using tall units and securing them to the wall with just a few screws, then using removable tension rods and fabric to hide gaps. But for the real deal—caulk, trim, and paint—you usually need the landlord's blessing.

Leave a comment
This site is protected by hCaptcha and the hCaptcha Privacy Policy and Terms of Service apply.